Edit a course
You need to Upgrade to a toolkit subscription to save your work but you can try all the editing tools free
Edit track and fence positions
Step by Step.
- Open the Toolkit on your desktop, tablet or smartphone. As a beginner you will find desktop or laptop easier. On smartphone, rotate your screen to landscape
- Select the event and open the course you wish to edit
- Tap the Edit icon
- Use the icons on the right to add, delete, move markers (jumps, compulsory passages or waypoints), drag or erase track, renumber jumps automatically
- After the first edit press Save to make sure you are authorised to make edits. (You may have been added as a collaborator with view only access)
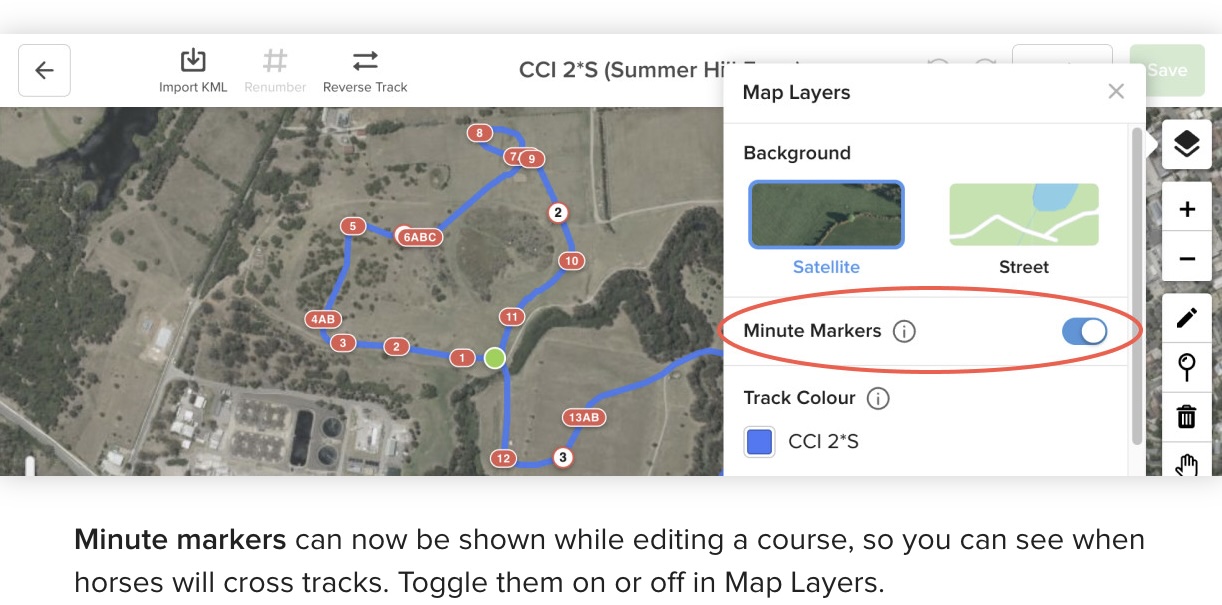
- Provisional minute markers appear in the editor to give you a feel for what the optimim time will be. They will move as you drag or erase the track.
- Continue editing. If you are making a lot of changes it is a good idea to save your work regularly
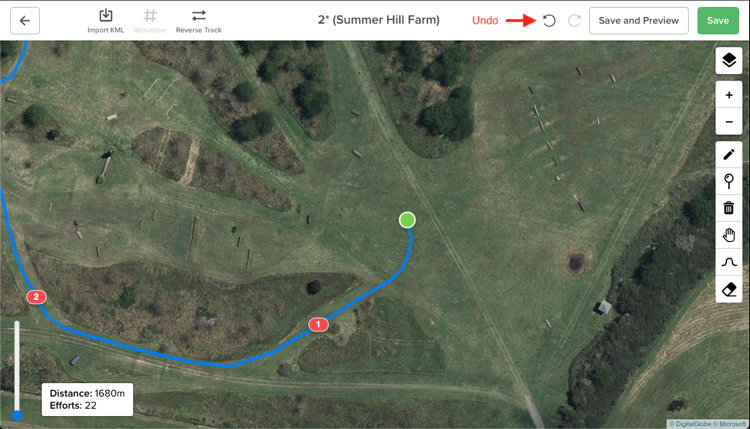
- Tap Arrow icons to Undo/Redo last command
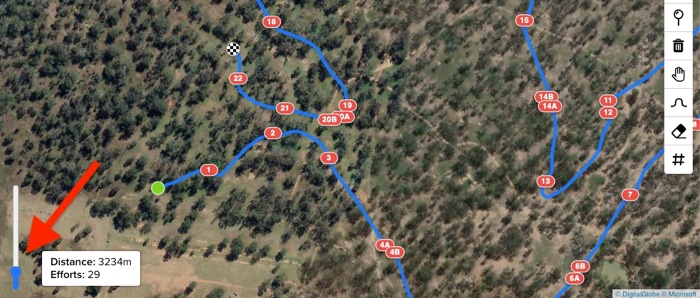
- Use the vertical slider to smooth the track display in the online viewer and CrossCountry app
- Save to finish

Video Tutorial (Create and edit a track)
Edit fence properties, photos etc
Step by Step.
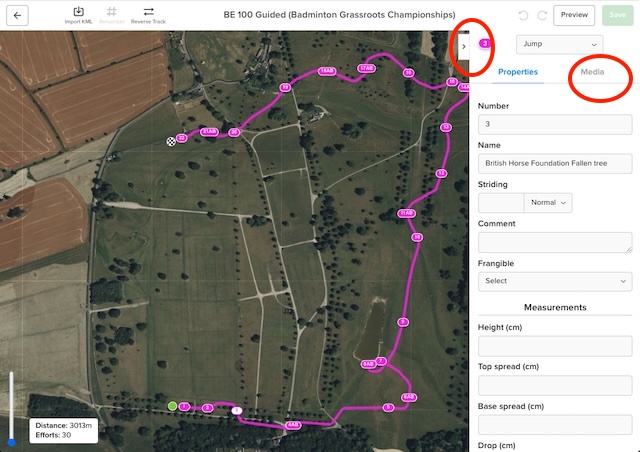
- Tap the fence you want to edit
- Edit the properties such as name or striding
- Fence measurements and frangible tag (but not type) are displayed in the CrossCountry app. An option to turn them off in the app will be added
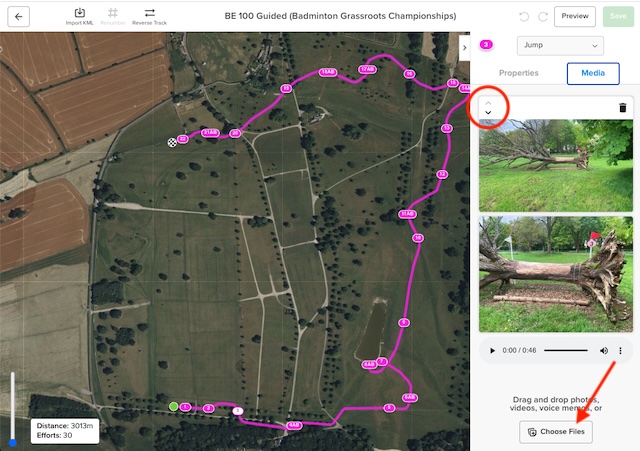
- Tap the horizontal arrow to finish or the media tab to add photos, video or audio
- Add a photo, video or voice memo from your computer or camera roll. You can drag an drop a photo on your PC
- Resequence photos with the up and down arrows
- Open the Toolkit on your desktop, tablet or smartphone.
- Alternatively, when you upload a course you will be prompted to "Open in Toolkit"
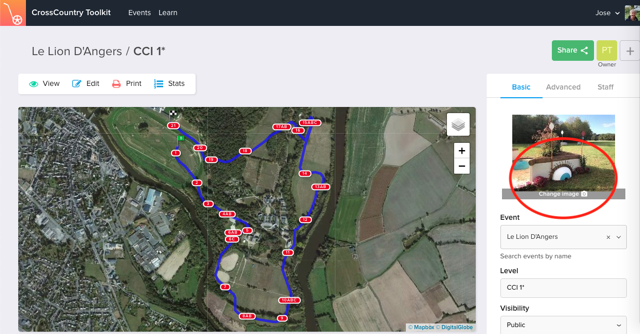
- Tap Change image
- Select the new thumbnail from the gallery
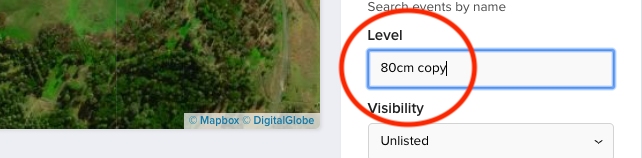
- Change the name by typing the new name in the Level
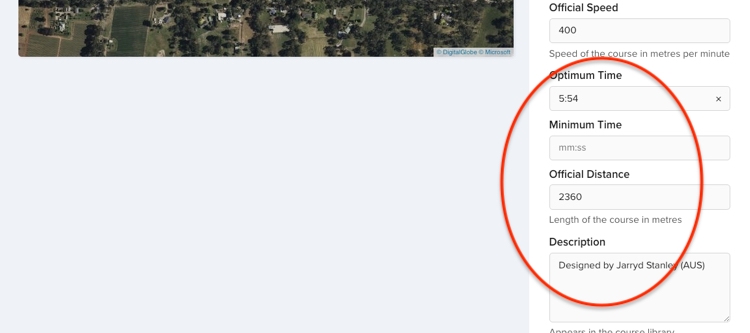
- Change any other values such as optimum time. The Advanced tab has more options
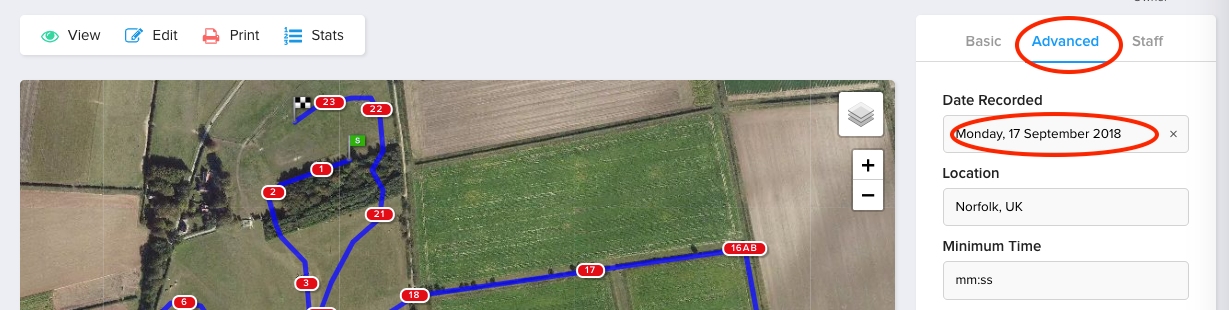
- If you created the course some time ago you, change the date under the Advanced Tab as this is displayed in the library and could be confusing to competitors
- Set visibility to Public
- Tap Save to finish
- Select the event and open the course you want to edit
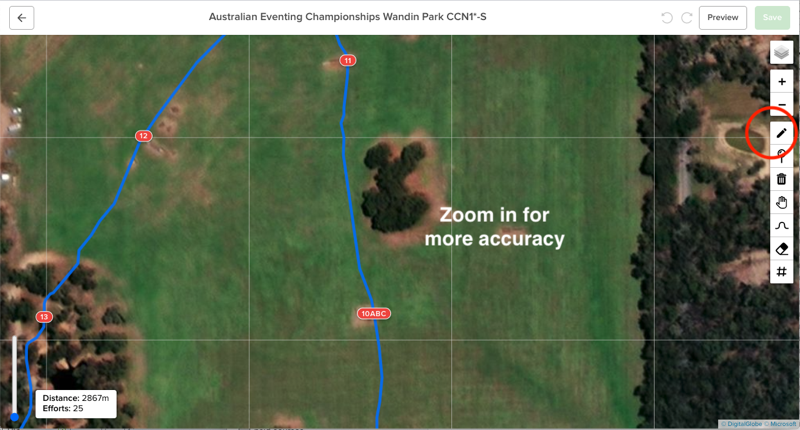
- Zoom in so you can be more accurate
- Select the Draw Track tool
- Select the Start or Finish and continue adding GPS points by clicking along the map
- To finish press Enter or Accept
- Open the course
- Select the Erase Tool
- Select the Draw Track tool
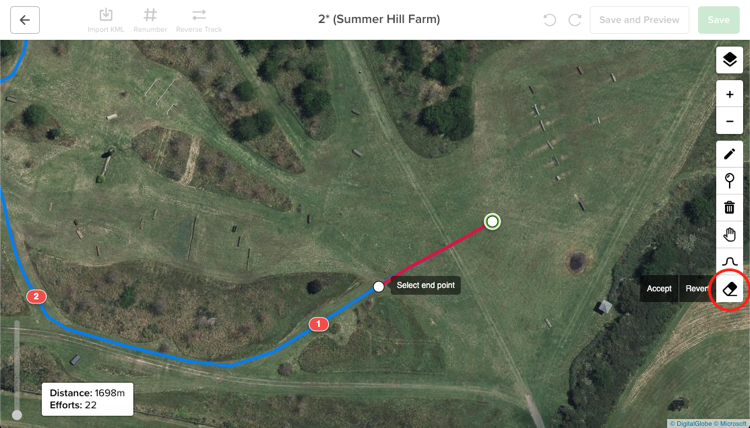
- Select the Start or Finish and select the point on the track you want to shorten it to
- To finish press Enter or Accept
- Remember you can undo it and redo this and any command before saving
- Select the event and open the course you wish to edit
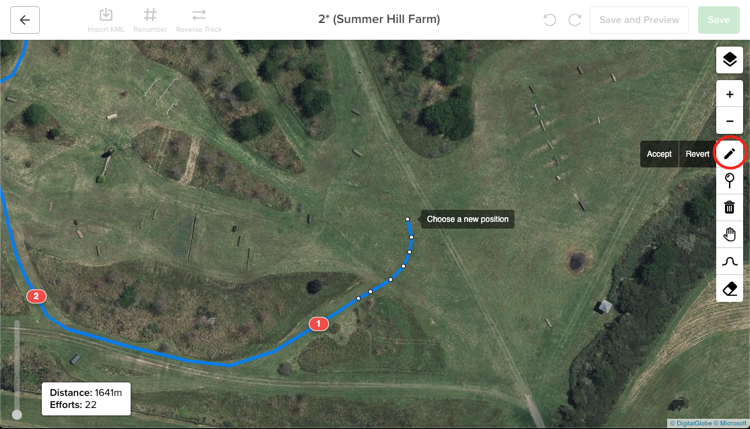
- Tap the Free-Draw icon
- Zoom in so you can be more accurate
- While you can use the tool on your smartphone or tablet, its easiest to start off on a desktop or laptop with a mouse
- Select your start position on the track
- Add your points, returning to the track where you want to rejoin
- The track to be deleted will go red
- Accept the change
- Remember you can undo it and redo this and any command before saving
- Save to finish
- Open the Toolkit on your desktop, tablet or phone
- Select the event and open the course you wish to edit
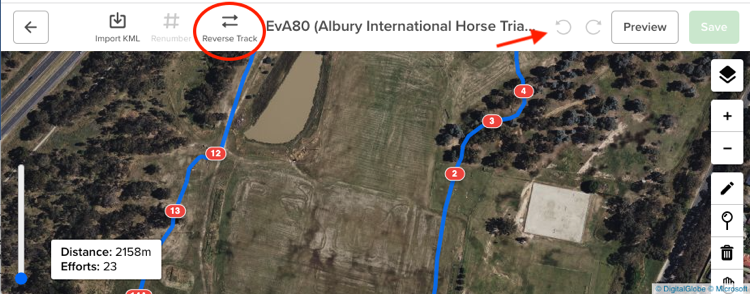
- Tap Reverse
- Remember you can undo it and redo this and any command before saving
- Save to finish
Please note that if you add a video or voice memo, it is converted on our server into various formats for different smartphones or computers to read. This may take a few minutes during which, if your course is public, users will receive an error if they try to view or download. It is best to temporarily make your course unlisted while you add video or audio
Video Tutorial (add photos and other media)
Change track colour
"Blue numbers on yellow" Match your tracks to their class colour and number text in your print maps and the CrossCountry app. Help riders distinguish between courses. Add variety. You can now overlay multiple courses in the Toolkit editor
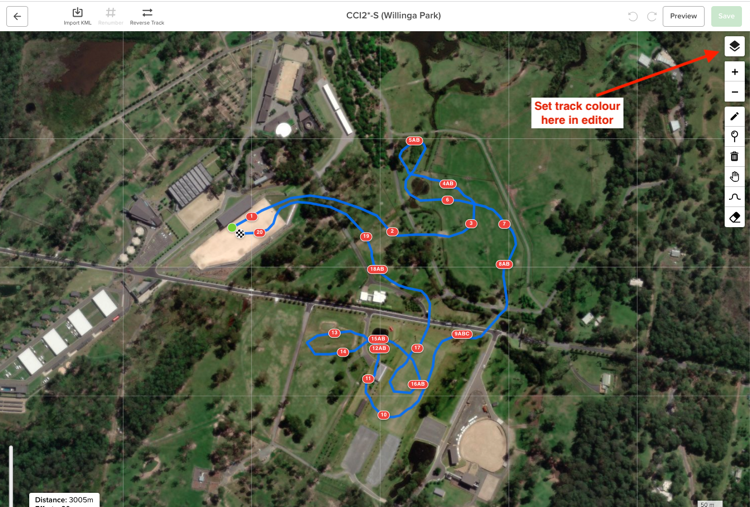

Tap the white square with red diagonal line to revert to the original blue track with red numbers
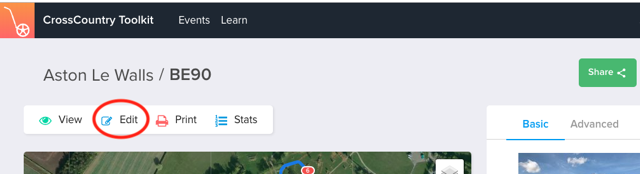
Change Course Details and Thumbnail
Make riders and eventing fans want to click on your courses in the library by choosing an attractive thumbnail. When you publish a course, the default thumbnail is the final fence but you can change it to any fence photo or upload your event logo.
Step by Step.

Video Tutorial
Thank you to Badminton Horse Trials for the Grassroots course used in these videos.
Move the Start and Finish
Extend the Start/Finish
Shorten the Start/Finish
Video Tutorial
Free-Draw Tool
Use the free draw tool to add a loop, figure of eight or make major changes to the track
Step by Step.
Video Tutorial
Reverse a course
You can reverse a course and automatically renumber all the fences.
Step by Step.