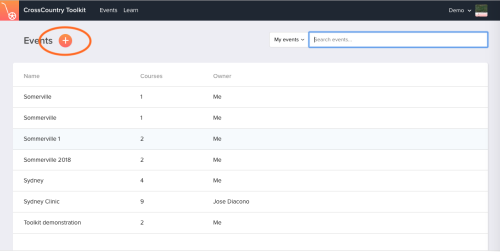
Manage My Events
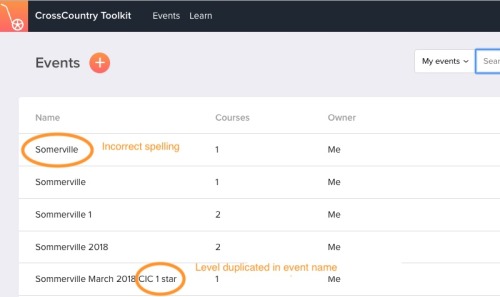
It is important to name your events and courses consistently both in your CrossCountry App and in the toolkit. Otherwise you will find it hard to find them and will be constantly switching between events
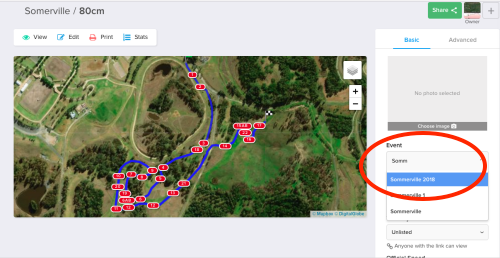
Move a course between events
- Open the Toolkit on your desktop, tablet or smartphone and open the event you want to move the course from.
- Open up the course and click in the Event box, as you start to type you will see a list of potential event names. Select from them.
- Save
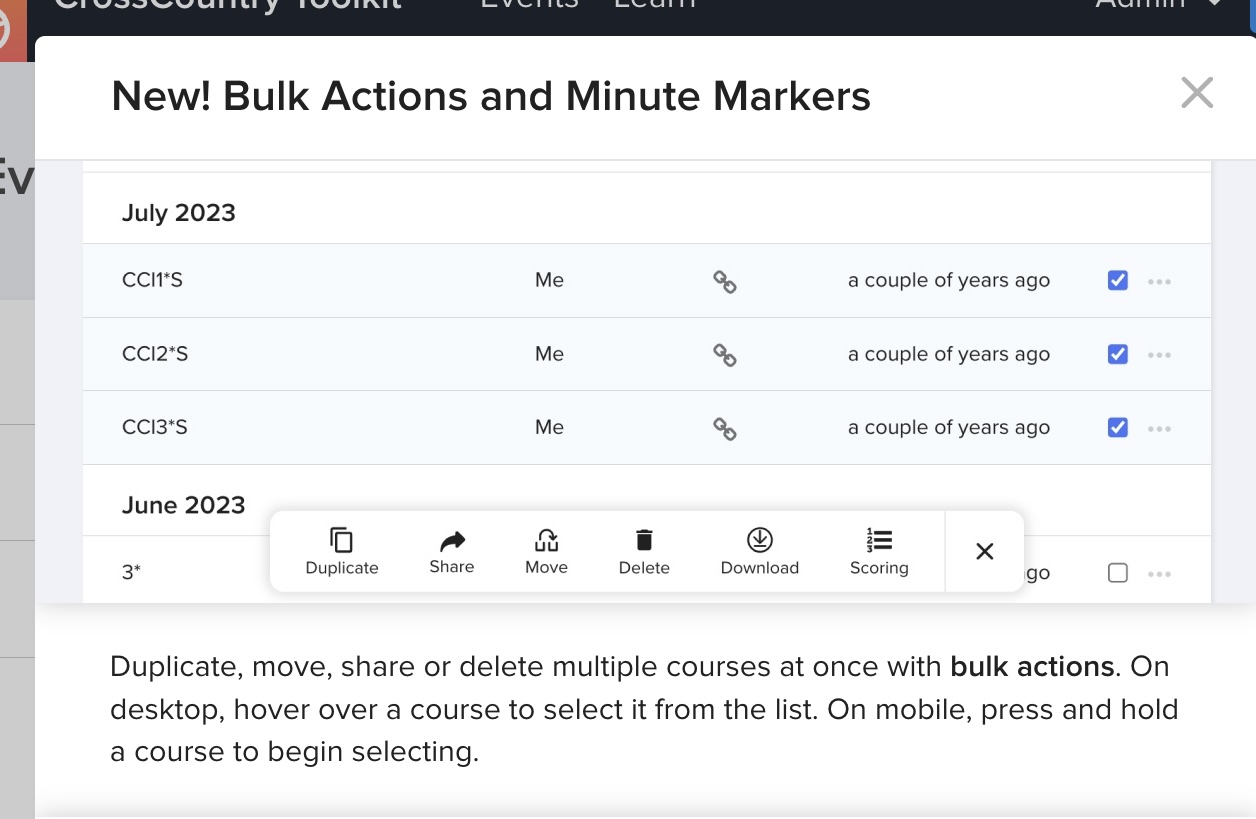
- If you have a multiple courses to move (or duplicate or delete) you can select them with the tick boxes
Add an event logo
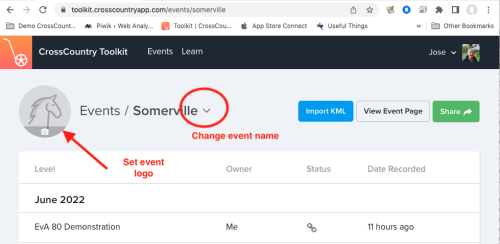
Open the event by tapping on it in the list. Add a logo or any image from your computer or camera roll. It will be saved automatically and appear in the latest events carousel (if the event has recently published courses) and on the event page in CrossCountry app.
Add links to an event
Give riders, volunteers and fans one place to find everything. Attach links — start lists, results, livestreams — directly to your events, so everything they need is right where they’re already looking.
Event links can only be edited by the event owner and are a subscription only feature. If you are not the owner but are a collaborator on the courses you can create a new event and move all the courses into it or email support@crosscountryapp.com to request a change of ownership
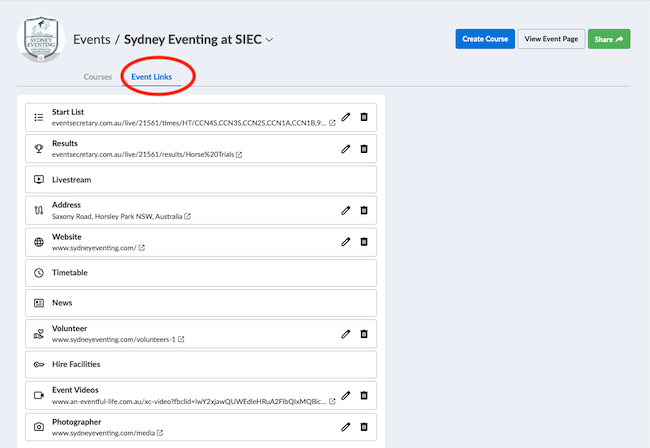
- Open the event and click on the Event Links tab
- Add any fields you wish. All are optional
- For the address type in the street address (not a google maps link!)
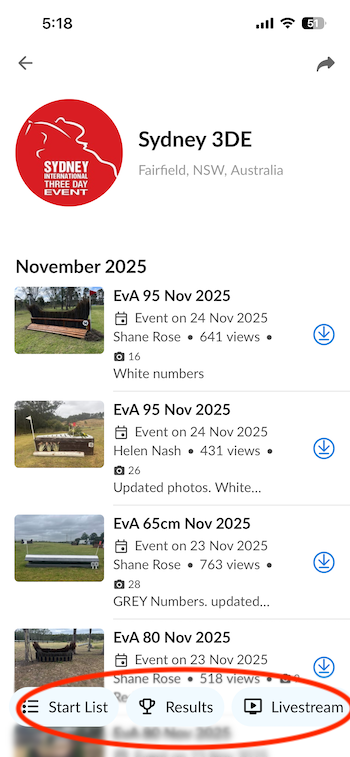
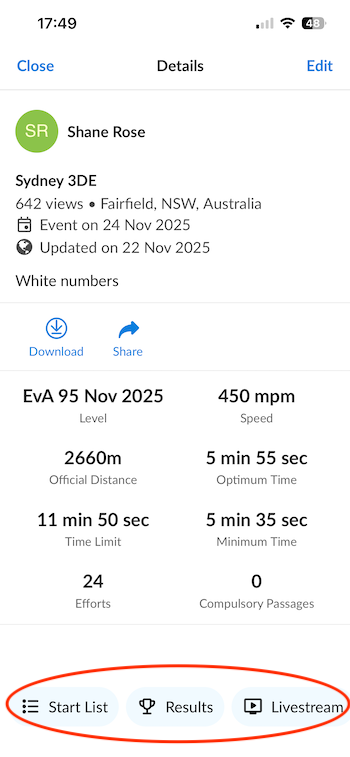
Links appear in a carousel at the bottom of the event page and course details page on CrossCountry app
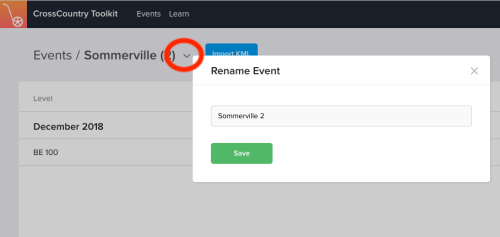
Rename an event
Open the event and click the down arrow next to the name. Type in the new name. if there is already an event by that name, the toolkit will tell you so you can move your courses into it.
Create an event
An event will be created when you upload its first course but you can also create them in the Toolkit and then move existing courses into the new event. You may want to create a new event if you have a new title sponsor
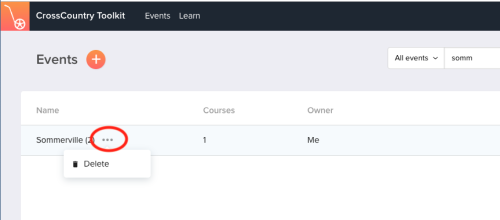
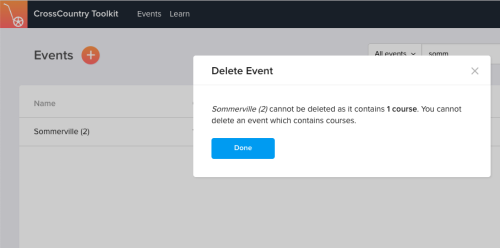
Delete an event
Tap the 3 dots beside the event name.
You cannot delete an event if it has courses in it
Tips and Best Practice
Do your event folders look like this? Here are more Tips and Best Practice from our blog to get you organised