Print an eventing course map
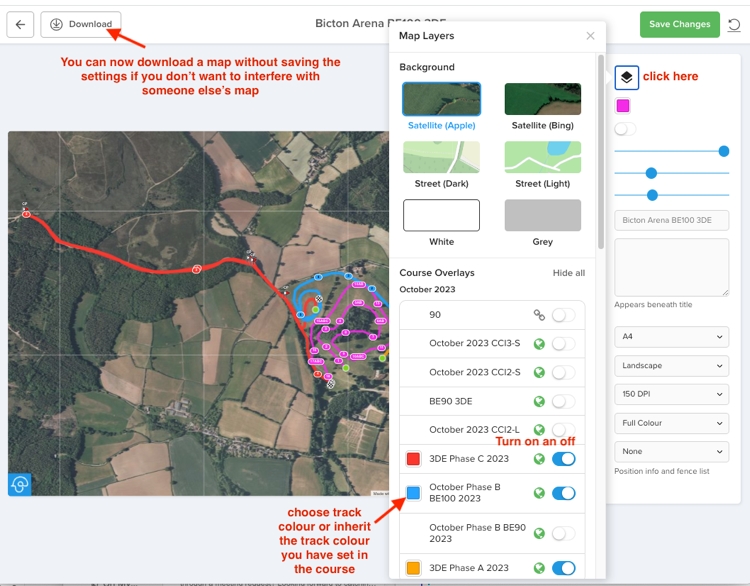
Print automated maps in many formats and download as pdf. Save the setup for later. NEW Print multiple courses on the same map. You can also exit without saving the template so that you don't interfere with a colleague's work.
Step by Step
- Record your course with CrossCountry App or draw it in the CrossCountry Toolkit.
- Upload the course and open it in toolkit.crosscountryapp.com
- If you own the course or are a collaborator you will see the print option, If you do not see the print icon, contact the owner and ask them to add you as a collaborator
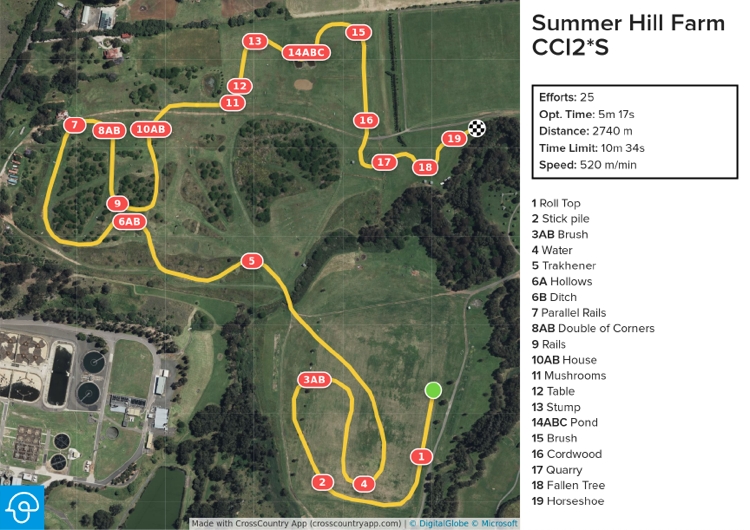
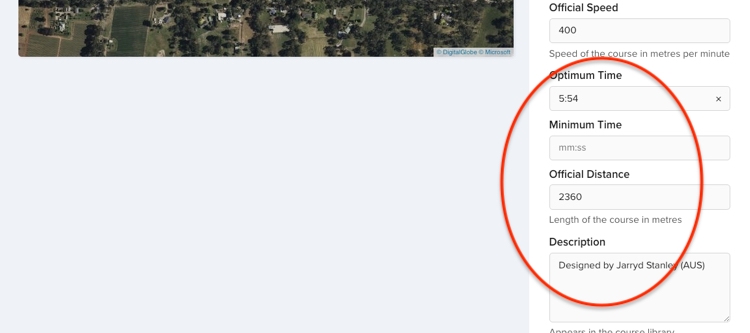
- Set the optimum time, distance and minimum time under the Basic Tab if you want them to appear on the print map
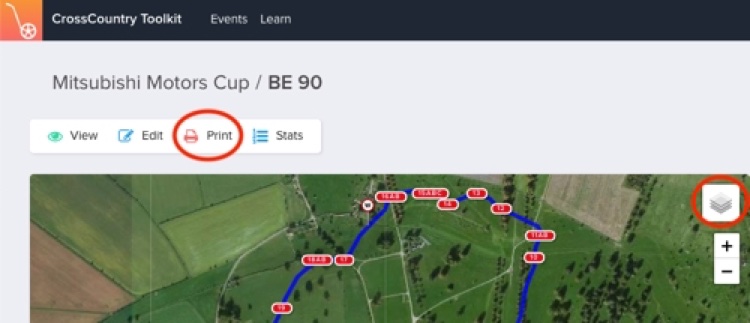
- Select Print
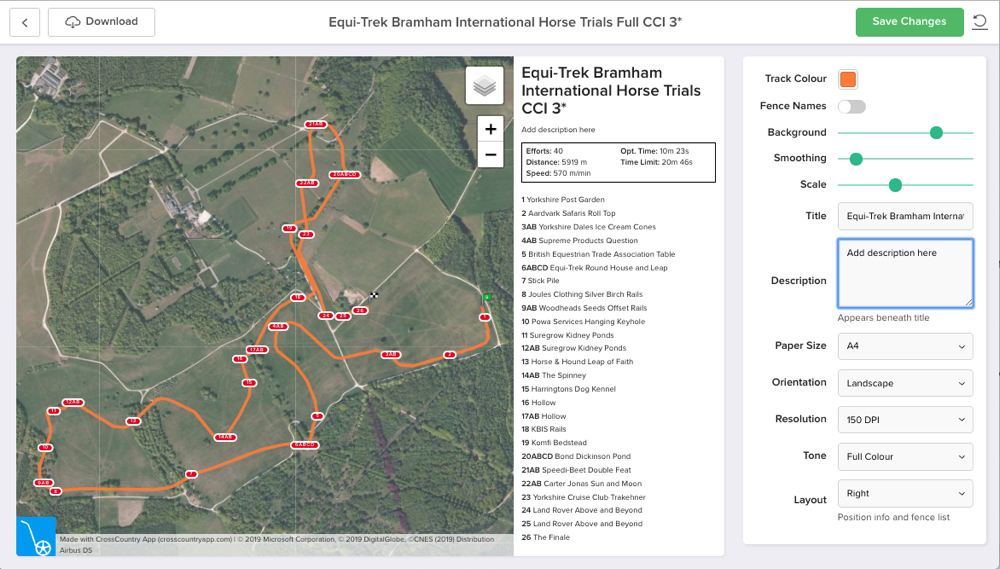
- Set up the format using the print control panel
- Use the slider to smooth the track
- Set track colour, landscape or portrait
- Select A4,A3 or A2 page size or US letter
- Select background with the layers button.You can fade it with the Background slider
- Select resolution 72, 150 (default) or 300 dpi. 150dpi is normally fine. 300dpi satellite will create a very large pdf so be patient while it generates
- Choose the fence list location or Display fence names on the map
- Save Changes to the print template so you can come back to it and collaborators will see them
- Tap Download to download the PDF
Print maps with multiple courses
- To print multiple courses, they must all be in the same event folder. Move them if necessary
- Open one of the courses you wish to print in the Toolkit. This is the primary course
- Click the layers button
- Select the other courses to overlay and choose the colour
Tips for polishing your multi course maps
If you have duplicated courses e.g. copying and editing the 2* to make the 1*, you will find that one track with be exactly on top of the other. In this case you can overlay the two tracks in the editor and drag them apart. This will change the distance and potentially the minute markers so if you are concerned about this, duplicate the courses and drag the tracks on the duplicates until you are happy with them. Smoothing the track with the editor slider bar will also help move tracks apart.
TOP TIP You can swap quickly between courses that are overlaid in the editor. See Overlaying courses.
Fence Lists
Only the fence lists or fence names from the primary course can be displayed on the map. If you wish to add other fence lists, generate a Pdf map for these and use a pdf editor such as Photoshop to cut and paste the map and lists into a new document.
PLEASE NOTE: The terms of use of the satellite imagery suppliers and our terms of use state You must always display the copyright information