Statistics, Exporting & Elevation
You need to Upgrade to a toolkit subscription to use the export functions
You can export the following files from a course:
- Builders report with comments
- Fence numbers for a scoring system
- Statistics for commentators
- KML file to use in another Geographic Information System e.g visualising elevation in Google Earth
- Fence photos as a ZIP file
Export Builders Report
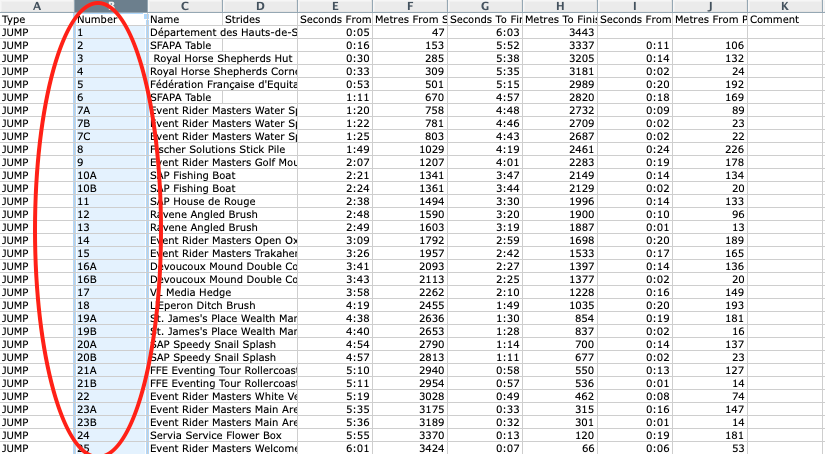
Export a fence list with instructions for the course builder as an easy to print CSV file. The report includes:
- Fence numbers
- Running efforts count
- Fence names
- Metres from start and previous fence
- Private Builder Instructions
Step by Step
- Open the course in the Toolkit
- If you have not already done so, add your builder instructions and/or fence names in track editor. Here's how Builder instructions do not appear to riders in the CrossCountry app so you do not need to delete them before publishing.
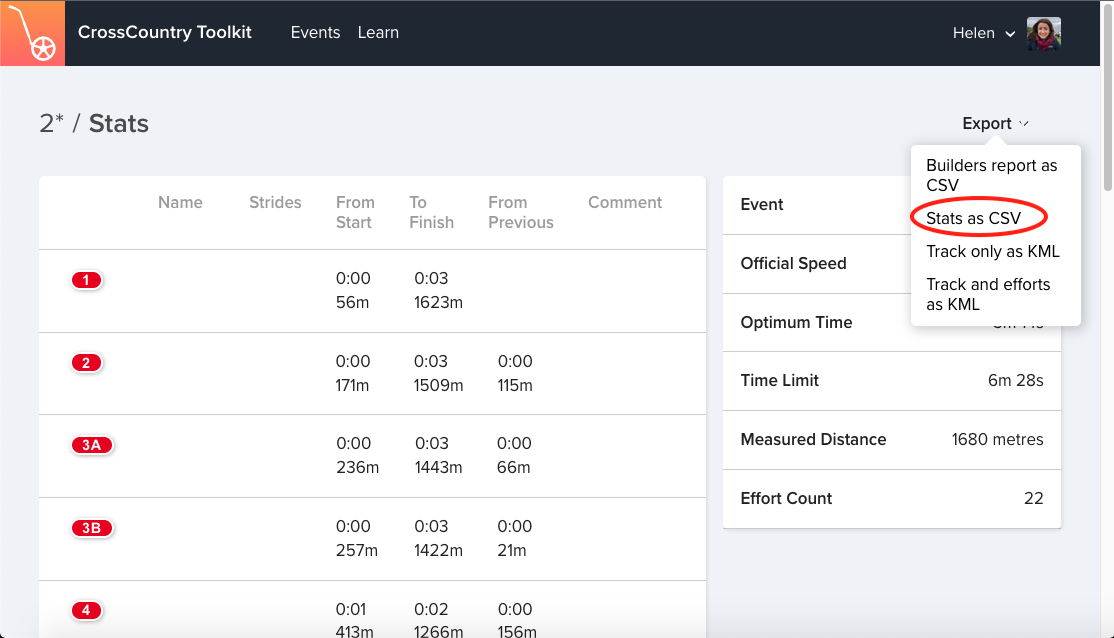
- Click the stats button
- Click the Export button and select ‘Builders Report as CSV’ in the drop down
Video Tutorial
Export fence numbers to scoring system
If your scoring system has a bulk import function you can save a lot of typing and avoid errors by extracting the fence numbers directly from the course
Step by Step
- Upload the course from CrossCountry App to the Toolkit
- Open the course in the Toolkit
- Tap the stats button
- Tap Export and the drop down 'Stats as csv'
- Save the csv file
- Open the csv file and copy the columns you require
- Paste them into your scoring system
Export stats for commentators
Commentators love the stats that are automatically derived from the course. They can see what time the competitor should be at each fence if they are to meet the optimum time (counting up or counting down). So they can say "they have 2 minutes to get home for here", "this is the 6 minute mark" or "they have been galloping for 3km". The stats report also includes Frangible information and fence measurements if these have been entered
Export a spreadsheet of time and distance statistics as a .csv directly or convert it to a pdf
Step by Step
- Open the Toolkit on your desktop, tablet or smartphone.
- Search for the event (under all events)
- Select the course in the event folder
- If you cannot find the course you are looking then the course may be not be public. If so, you can ask the organisers to add you as a collaborator to the course.
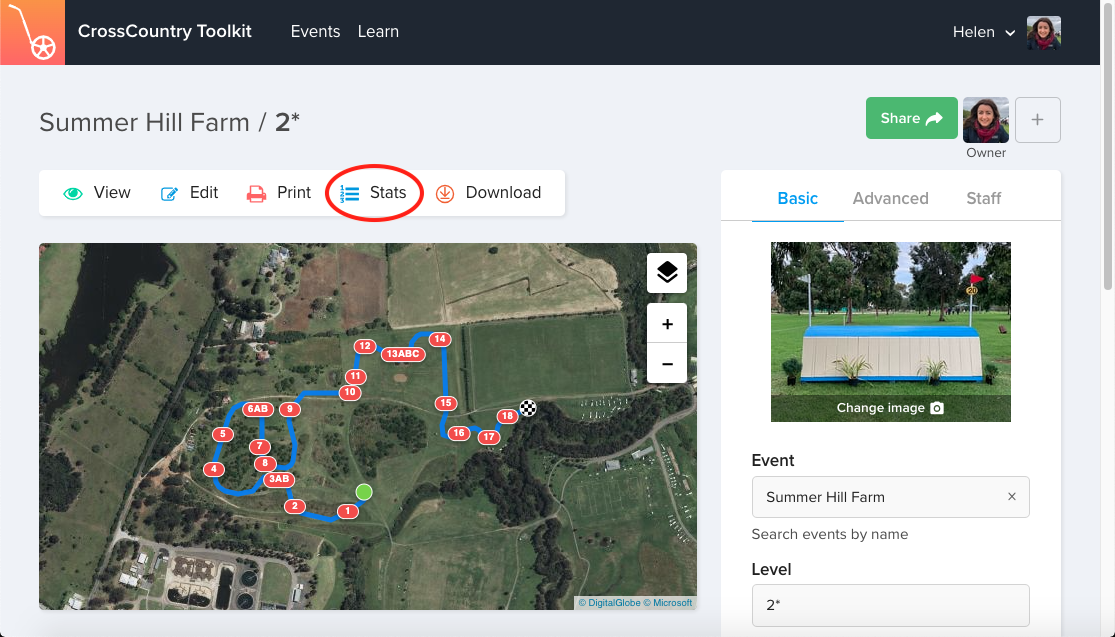
- Click on the Stats tab
- Click the Export button and select Stats as CSV. Save it to a folder on your computer
- The file will automatically open in Excel on a PC or Numbers on a Mac
Video Tutorial Export stats for commentators
Export KML
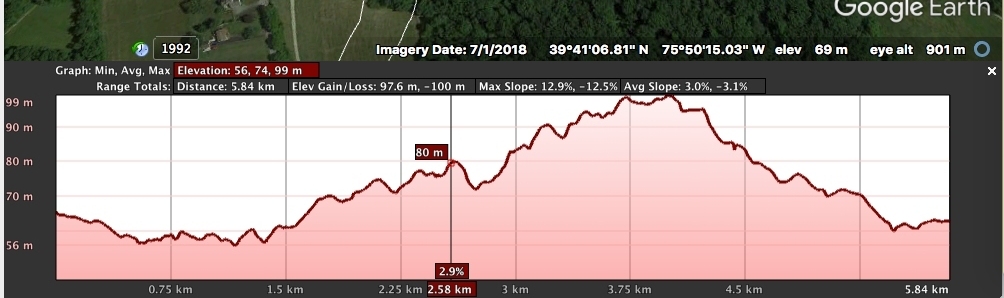
KML is a universal file format that can be imported into most Geographic Information Systems. It can be used to drive a sophisticated machine to aerate the track, by a TV crew planning their cabling in Google Earth or to create an elevation profile in Google Earth
- Open the Toolkit on your desktop, tablet or smartphone.
- Search for the event (under all events) and open the course
- Click on the Stats tab
- Click the Export button and select Track only as KML or Track and Efforts as KML. Track and efforts also exports Minute Markers
Visualise elevation using Google Earth
Putting your KML track into Google Earth is a powerful and flexible way to see terrain and precise gradients and where fences are positioned on uphill or downhill slopes. If you are a rider going to a new event, check how hilly it is so you can make sure your horse is fit
Video Tutorial
Export fence photos as zip file
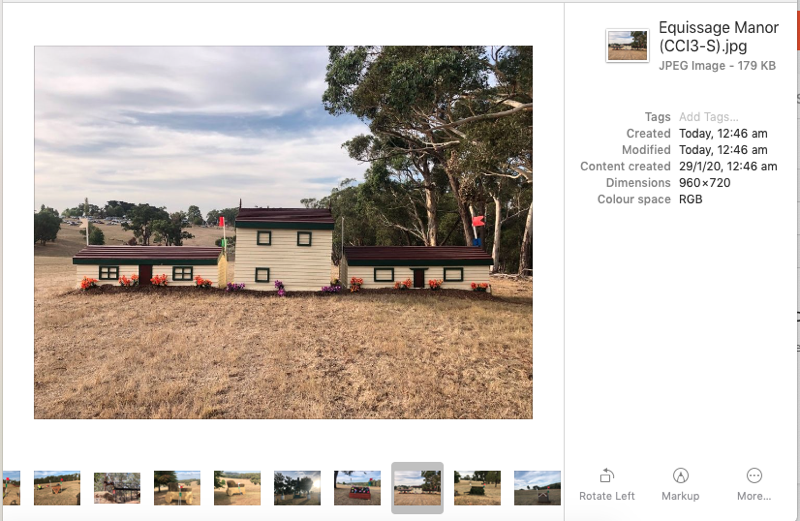
You can save all the photos from a course to your computer for use by XC control, to add to an asset register and to compare undressed vs dressed fences
Step by Step
- Upload the course from CrossCountry App to the Toolkit
- Open the Toolkit on your desktop, tablet or smartphone.
- Login with your email address and password. You will be automatically logged in next time you use the toolkit
- Open the course in the Toolkit
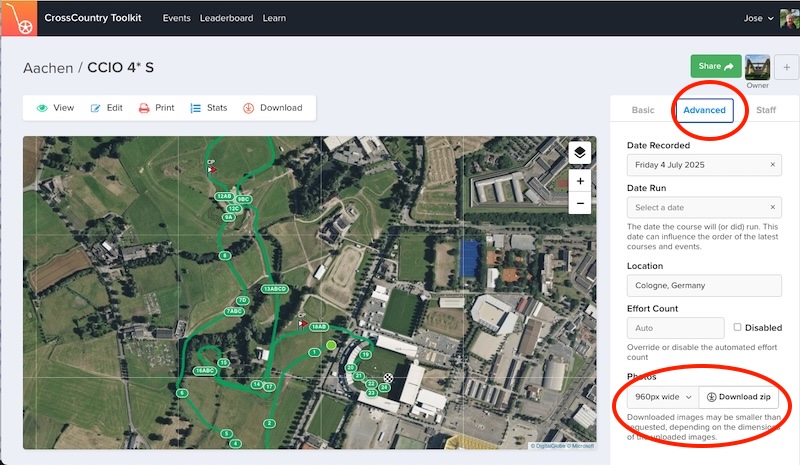
- Select the Advanced Tab
- Select the size and Tap Download zip save to your computer
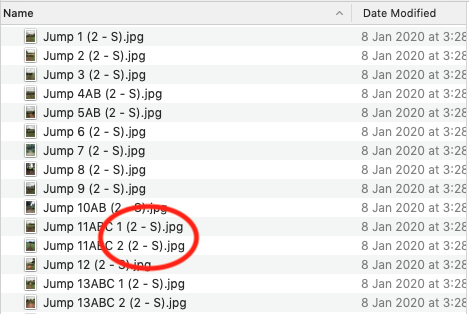
- On your computer, tap the zip file to unzip it. On an iPhone it will be in your Downloads folder
- If jumps have no names they will be named 1,2, 3 etc You can have multiple shots of the same jump
- If jumps have names the files will be named accordingly
- Scroll conveniently through the photos in the folder (MacBook example)