Creating a Guided Course Walk
Create a guided course walk for your event, to promote your coaching skills or a sponsor. It's free!
1. Record the course (you can add in final dressed photos, videos and jump names at any time)
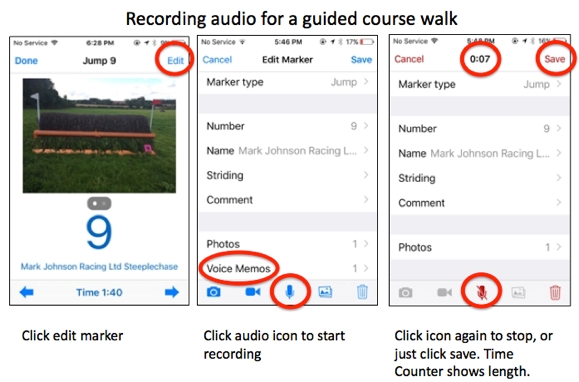
2. Record audio. You can do this at the same time as you record the course by clicking the microphone icon after taking the jump photo. Or you can add the audio afterwards.
3. Ask us for help if you want to add in sponsor logos or animations.
3. Send it to us to put on our server for download Here's how
4. Promote it on your website and social media, making sure to explain spectators can download the CrossCountry Lite app to view the course.
5. You can also create your paper course maps from the app with CourseDesigner
Tips
If the course has already been recorded, you can download it or receive it by email. Add voice memos to fences - you can record several and delete some later.
This video shows how to edit fence names, add videos and audio and how to delete a voice memo if you need to re-record it.
Since you will talk about the different elements of a combination together, it is best to record the combination fences as 5ABC rather than individually 5A, 5B, 5C. Then listeners can swipe through photos of the different elements while they listen to you (as soon as you swipe to the next jump, the commentary stops playing.)
Take photos in landscape. They fill the iPhone screen so viewers to see more of the jump without double tapping.
You don't have to be physically at the jump to record audio. Email the course to an iPad, then record the commentary on your iPhone while you swipe through the large jump photos on the iPad. This is very time-efficient for busy course designers or riders.